Go-To Binds Yoyo Trick Core
Left Handed?
Learn three of our favorite casual binds to do.
Yoyo In This Video:

For this yoyo trick we also recommend:
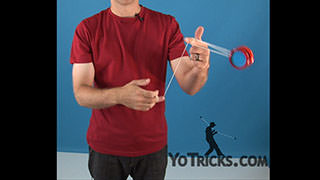
Go-To Binds Yoyo TrickIn this video, I am going to teach you our Go-To Binds. If you have watched a lot of our tutorials, these are the binds that we come back to time and time again. In this video, I just want to teach you three of those. The first one looks like this. Second one adds a little flourish to the beginning of that, and it looks like this. And the third one is done on the other side of my body, that looks like this.
When you are first getting into the first one, it is a good idea if you already know how to do the Reverse Flip on the Front Mount. We have another video that teaches you how to do that. Pretty much, the technique is the same, except halfway through the flip, you are going to pinch the string so that it goes into the bind. Of course, the other difference is that it is not off of a standard throw, it is going to be off of a breakaway, because that allows the yoyo to be spinning the right direction for this to be a backspin mount.
If you are not quite sure what I am talking about in terms of the backspin mount or the spin of the yoyo, definitely check out our Bind Theory video because we get into the mechanics of how all binds work. That will help you learn these binds and pretty much any other bind that we teach as well.
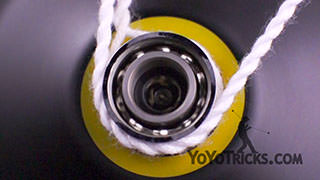
Once you have mastered the reverse flip on the front mount, you are going to be able to work on this one. Watch what happens if we kind of slow that motion down. You get set up, you do your reverse flip, and look at where we are halfway through. We are pretty much set up for a regular bind. So if we were just going to pinch the string right here, and change the height of our hands, we have achieved the bind. But instead of having the yoyo just sitting still, what we are doing is we are actually swinging it away from us and feeding that pinched tail right into the gap of the yoyo.
That is all that this bind really is. It is just a reverse flip, and then tossing the yoyo away from you while feeding the pinch into the gap. It is just as straightforward as that. Now if you are struggling with your reverse flip a little bit and you still want to work on the mechanics of this bind, one thing that you can do is just practice the swinging motion without the reverse flip. So you just get your bind set up, pinch the string, swing the yoyo away from you, and you can just kind of practice that until you can get it down.
Like I said, there is one thing that you can do to make it work, is you do want to feed the string into the gap a little bit. If you are missing the way I was showing, then that is probably what the problem is. You need to be tossing the string in toward the gap a little bit. There is actually a few ways that you can do that as well. What I like to do is, I like to throw the string kind of towards the yoyo, but underneath it a little bit, and that makes sure that the bind comes out clean every time. But if you want to, you can actually move your opposite hand toward the yoyo a little bit and even hold it just above the yoyo and if you do that, it almost always comes out clean but your bind can be just a little bit tighter. So that is something that you will also want to experiment with.
Once you are getting your bind more consistent, then you can add in the flip. What you want to do is you want to again, it is just like a normal reverse flip. But as the yoyo is passing by your arm, make sure that you bring your hands together because you want to make sure to get your tail long enough to achieve your bind. If you do not do that, if somehow you do the flip in such a way with a short tail, you are almost not never going to be able to get this bind to work. The easiest way to make it work, again, is to just bring your hands together. As you are doing the reverse flip, that gets you a tail that is long enough, can allow the bind to work.
The other thing that is important is that you pinch at the right time. You do not want to pinch at the beginning. You want to pinch the string right after is passes by your yoyo hand. That will make sure that you are set up for the rest of the trick and you can get your bind really consistent.
For the second bind, all that you are really doing is you are adding a flourish on top of the first bind. Technically, it is not a different bind at all. But let me show you what I mean. All that you are going to do is get set up for the first bind, and then you are just going to roll over your finger one more time, undo that roll with some slack, and then you are set up for your first bind. Then you just perform that bind and bring it back to your hand. Let me show you how the slack works.
What you are going to do is, like I said, you start with an additional roll and then you have got the string coming off of your yoyo hand. What you want to do is pinch one of these two strings, or both of them with your thumb underneath the string coming from your yoyo hand. That will allow you to swing this string around the yoyo which will then set you up in the position that you were in to begin with and then you can complete the bind. When you are doing that particular swinging motion, one thing that will make it look just a little bit nicer is if you swing it to the side instead of going around the top of the yoyo, you can see how that looks just a little bit awkward. But if you go from the side, you do not need to use quite as much motion and it gives it more of a 3D, lateral effect, which just helps the trick look a lot nicer.
The other thing that you want to pay attention to while you are doing this is getting the timing right because that will help the flow of the trick work a lot better. When you first do that second roll, you can see the yoyo swings back toward you. As the yoyo is swinging back towards you, that is when you want to undo the slack. The reason you want to do that is because then the yoyo will swing back forward so that you can complete the trick. So when you put it all together, you can see the yoyo is going to swing back towards you, and then it swings forward and you can complete the bind.
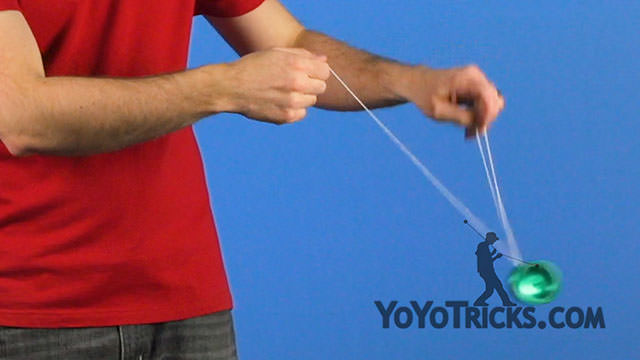
For the third bind, like we said, this is on the other side of your body, and this one is a lot more simple than the other two. It is simple to understand but it kind of hard to perfect. This is one that you might have to actually work on a little bit more. All you are going to do for this one, is again, you are going ot get into your undermount just like the other binds that we have showed you. And then you are going to swing the yoyo across your body, you are going to bring your hands together, which will make the tail a little bit longer and then you are just going to toss the yoyo off to the side. Ideally, it will bind.
Now one thing that you can do to help ensure that it is going to bind more often if you are going to pull your yoyo hand in towards you just a little bit. That will pull that tail around which will rotate the bearing which will help to execute the bind. As you are doing this, what you are going to find, especially early on, a lot of times the yoyo either will not bind or you will end up with a really awful tail. There is a couple of things that you can pay attention to, to help make this bind work better. One thing is you should pay attention to how quickly you are throwing the yoyo over. If you throw it too quickly, then the bind might not have a chance to take and the yoyo will not come back the way that you want it to. The same thing can be true the other way, is if you throw it too slow, a lot of times that will get you a tail as well and you are going to have to clear the yoyo out to get that worked out.
So you are going to want to find the right balance as far as the speed goes. The other thing that you can toy around with a little bit is how much you pull back with your hand. If your timing is a little bit too late, or if you pull too much, those can cause different types of problems. So again, this one is more about experimentation, because yoyos have different gap widths and your string can be thicker or thinner and for all of those different reasons it is going to play just a little bit different for each yoyo. The other thing you can experiment with is you can toss the yoyo to the side if you want it to be a little bit safer, you can kind of just drop it down a little bit, and that will help a little bit because there is not quite as much motion on the yoyo. As you can see, it is a pretty straightforward motion, it is not hard to understand, but give yourself a little bit more time to work this one out because it will take some time to perfect it. So those are our three go-to binds.