Horizontal Black Hops Yoyo Trick Core
Left Handed?
Learn how to do the horizontal style version of the popular yoyo trick known as Black Hops. This trick also introduces Horizontal Forward Eli Hops, as well as a useful tilt adjustment technique for horizontal play.
Yoyo In This Video:

For this yoyo trick we also recommend:


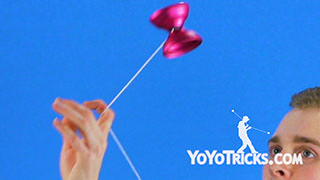
Horizontal Black Hops Yoyo TrickIn this video, I am going to teach you the trick Horizontal Black Hops. It looks like this:
So as you can tell, this trick is super cool, so before you start learning it, I would recommend that you get comfortable with horizontal Eli Hops, the horizontal trick Simple Geometry, as well as regular Black Hops.
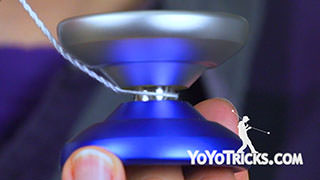
Horizontal Black Hops is based off of the fundamental trick Horizontal Forward Eli Hops. We are going to work on Horizontal Forward Eli Hops before we move on to the hand switching. So Horizontal Forward Eli Hops starts with a breakaway throw. When you throw the yoyo, you need it to be pretty much perfectly horizontal. It can be a degree or two off in either direction, but if you are throwing it like this, it is just not going to work.
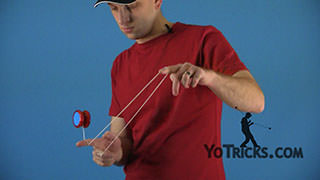
So after the horizontal throw, you want to do a Banana Turnover and let the yoyo pinwheel underneath your thumb. As the yoyo is moving between your two hands, you want to bring your hands together. The yoyo is going to shoot forward just like this. After the yoyo shoots forward, you can take your non throwhand pointer finger and hook it over top of the string with your palm down. Then you can pull your hands apart, which is going to bring the yoyo back towards yourself. You can hop the yoyo off of the front of the string.
If you are familiar with the timing and cadence of conventional horizontal eli hops, then forward horizontal eli hops should feel very similar. Except for the fact that you non throwhand pointer finger is pointing down instead of up. That is definitely something to pay attention to, especially as we move on to the hand switching later on in the trick.
Now, if you want to bind while you are practicing this, it works just the same way, except you will notice that the yoyo is actually already in an undermount when the yoyo comes back from the hop. So all you have to do is just swing the yoyo underneath your non throwhand wrist. The yoyo will come right back in a bind. The last thing that you will notice while doing this trick is that the yoyo naturally wants to level itself out and start spinning vertically. The reason for this is because as the yoyo is shooting out, it actually naturally wants to level itself out because it is so far away from your non throwhand. So to combat that, you need to do an adjustment with each and every hop. So let’s break that down.
Now, the horizontal plane adjustment technique can be pretty subtle, so we are going to give you a nice overview right here. To set the scene, this is a top down shot and the yoyo is spinning horizontally, just like this. You can see that the yoyo is in a trapeze. I am standing back here, and the yoyo is hopping in this direction. Now to define our terms, we need to divide the yoyo into two halves. We have the front half, which is right here and is in the direction that the yoyo is hopping. We have the back half which is facing me while I am doing the trick.
So just like how I mentioned before, earlier in the video, after we do the banana turnover and bring our hands together and the yoyo shoots forward, it is immediately going to start tilting forward just like this. If we did not do this horizontal adjustment technique it would keep going back and forth until eventually the yoyo is spinning vertically.
So what we need to do on each and every hop is the horizontal adjustment technique. In order to do that, after every hop, we need to bring the yoyo back to flat. So we need to get rid of that tilt that is introduced when the yoyo is at the end of the string. To do that, we need to apply force to the front of the top half of the yoyo. So we can bring the yoyo up just like that. The way that we accomplish that is with the string while the yoyo is sitting on the trapeze. So, when the yoyo comes back and comes in contact with the string, we want the yoyo to move past our hands so that all three strings that are touching the yoyo are now on the front half. The back here is not going to work, all three strings need to be on the front half of the yoyo, just like how we talked about.
Then I can bring my hands closer together, which is going to move the string even closer to the front half of the yoyo. You will see that all three strings are touching the front of the top half. So now I can use the string and the weight of the yoyo to pull up to allow the yoyo to tilt back to the flat plane that we need after every hop.
How much you let the yoyo drop is going to vary pretty wildly depending on what yoyo you are using. We talk about this in our How to Choose a Yoyo for Horizontal Play video, so you might want to go check that out. It is also going to vary depending on how fast the yoyo is spinning, how far apart your hands are, and how much friction the string has against the yoyo. So this is something that you are just going to want to experiment with.
Now the proper form for letting the yoyo drop is that you want the yoyo to drop under its own weight. You do not want to move your hands down with the drop. So you do not want the yoyo to drop and your hands to drop at the same rate, rather you want your hands to stay mostly on the same plane. It is ok if they drop down a little bit, but you want your hands to come together and that is going to put slack in the string and allow the yoyo to drop in 3d space.
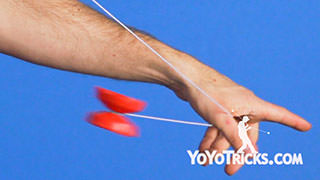
When we show you on the slowmo, you can really tell this really distinctive L shape that the yoyo is traveling in. So it shoots out straight, comes back, drops down, and I pull my hands apart, maybe lift my hands up a little bit, and then the yoyo comes up and shoots back out. Then I can just repeat that process over and over, and I can keep using that L shape hop and the horizontal adjustment technique to keep the yoyo on plane.
This horizontal adjustment technique also works with all the other hops that we are going to show later on in the trick in just the same way that it works with the trapeze.
So as you are working on that Horizontal adjustment technique, and as you are working to master forward horizontal eli hops, I would recommend that you get that technique down well enough that you are able to do about five forward horizontal eli hops, without the yoyo going off plane too much.
Once you have that down, you will be able to work on the actual Black Hops part of this trick, where you are switching the string between your hands. That part of the trick can actually be pretty difficult to learn while the yoyo is spinning because it is horizontal and you do not have a lot of time to focus on it. So I would recommend taking a look at these hand motions with a dead yoyo.
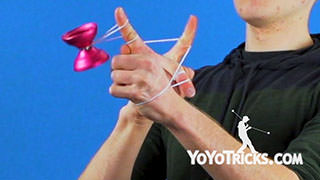
So, the yoyo starts in a trapeze around our non throwhand pointer finger, just like this. Then we can hop the yoyo forward. As the yoyo is traveling forward we want to do two things with our throwhand. The first is to take our throwhand thumb and hook it in front of the string just like this, which is going to help separate the string while we take our throwhand pointer finger and reach past the string, hook our pointer finger over top of it with our palm down, then we can pull our hands apart as the yoyo is coming back, which is going to land the yoyo into this brother mount.
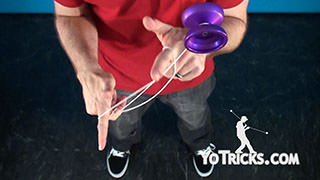
From here, we can hop the yoyo forward again, and we can take our non throwhand middle finger, hook it in front of the string, reaching past it, again, with our palm down. Then we can pull our hands apart, landing the yoyo on the bottom string. Here you will notice that my palms are actually facing me instead of facing straight down. The reason for that is that when the strings are orientated vertically instead of horizontally, it actually gives the yoyo a lot more room to land on the string, go down, and perform the horizontal adjustment.
From here, we can hop the yoyo forward, dropping our throwhand middle finger, then pulling your hands apart, bringing the yoyo back to the trapeze and his brother. We can hop it forward, drop our throwhand pointer finger, pull apart, bringing us back to the trapeze. From there we can either do an additional hop or we can go directly into a bind. So that is what it looks like with a dead yoyo.
To show you what it looks like with a spinning yoyo, it is like this: hop trapeze and his brother, middle finger, trapeze and his brother, and back to the bind. So let’s go over each one of those hops individually to give you the tips that you need to hit them successfully. Starting with the trapeze and his brother, of course you want to make sure that the bottom string is below the string coming from your throwhand thumb. If they are perfectly flat like this, you might hit both, and the yoyo might get tangled up between those two strings, which is going to cause you a lot of problems. Other than that, if you are having a hard time hitting that bottom string, you really want to pay attention to how close the yoyo is to your throwhand pointer finger. The closer the yoyo is to your throwhand pointer finger, the easier the hop is going to be. That is true of all of the hops in this trick.
So, after the trapeze and his brother hop, up next we have the hop that is on our non throwhand middle finger. This is definitely the most difficult and the most complicated hop in the whole trick. So I have got some tips for you. The first thing is that you really want to be mindful of the position of your non throwhand pointer finger and non throwhand middle finger. So if you hold them together like this, you are going to bind that it pretty much impossible to hit that bottom string leading off of your non throwhand middle finger. Instead you really want to try your best to separate the two strings, just by pulling my non throwhand pointer finger up and really pushing my non throwhand middle finger down. That helps separate the two strings and makes the bottom string as easy to hit as possible. The tilt correction for this hop can feel pretty weird because your hands are already so close together. But just focus on getting them even closer together so that the yoyo has room to drop on the string and level itself out.
After that, you want to work your way back down the hops just like how I showed you earlier in the video with the dead yoyo. So, Horizontal Black Hops can be a pretty challenging trick to master. So if you are really dedicated to learning this trick, I would recommend practicing all the sequences that I taught you in this video in the following formats:
The first is just the forward horizontal hops. Then, it is horizontal hop to trapeze and his brother to horizontal hop, and then bind. Then finally you want to add in the last hop, which is trapeze, brother, middle finger, brother, trapeze, and then lastly you can do the bind. So practice those three sequences and you will have this trick mastered in no time. And that was Horizontal Black Hops.
…And we are going to break down that adjudgement, uh… alright, we are going to break down that adjudgement- oh my what is going on. Ad-just-ment. We are going to break down that adjusment in a little bit more detail. We are going to break down that adjudgement- oh my – Adjust-ment. And we are going to break down that adju- I don’t know what is going on. Adjustment. Adjustment. And we are going to break down that adjuzz-. Uhhhh. I can’t say it.